


After removing the headphone jack from their latest devices, Apple introduced its new wireless earphones called AirPods. AirPods operates by using Bluetooth. You might think that these AirPods work only with Apple devices like iPhone, iPad, MacBook, etc. Surprisingly, you can also use these AirPods with Windows 10 PCs by following some methods shown in this article.
Note: Some functionalities of the AirPods and AirPod Pros are not supported when you connect them to your Windows system. Listening to audio on your AirPod pro or AirPods with Windows 10 works well, but the microphone quality might be compromised compared to the iOS and macOS connections.
So you might feel ok with your AirPods’ music quality with Windows 10, but audios in video calls might disappoint you if you are a regular iOS or macOS user.
Pairing AirPods with a Windows 10 device
To pair a new pair of AirPods to a Windows 10 device, follow on.
Before pairing the AirPods to a Windows 10, ensure that your AirPods are partially charged( At Least 40 Percent). If the AirPods are not charged enough, insert them into the AirPod case and charge them. Keep the AirPods inside the charging case during the pairing process.
1. Open the cap or lid of your AirPod’s charging case( Keep the AirPods connected to the charging case ).
2. Press or Tap and hold the circular button in the charging case’s rear part for a few seconds.
3. When the light the case starts blinking in white color, release the circular button.
4. Open the Settings app of your Windows machine by pressing Windows + I keys simultaneously or from the Start Menu.
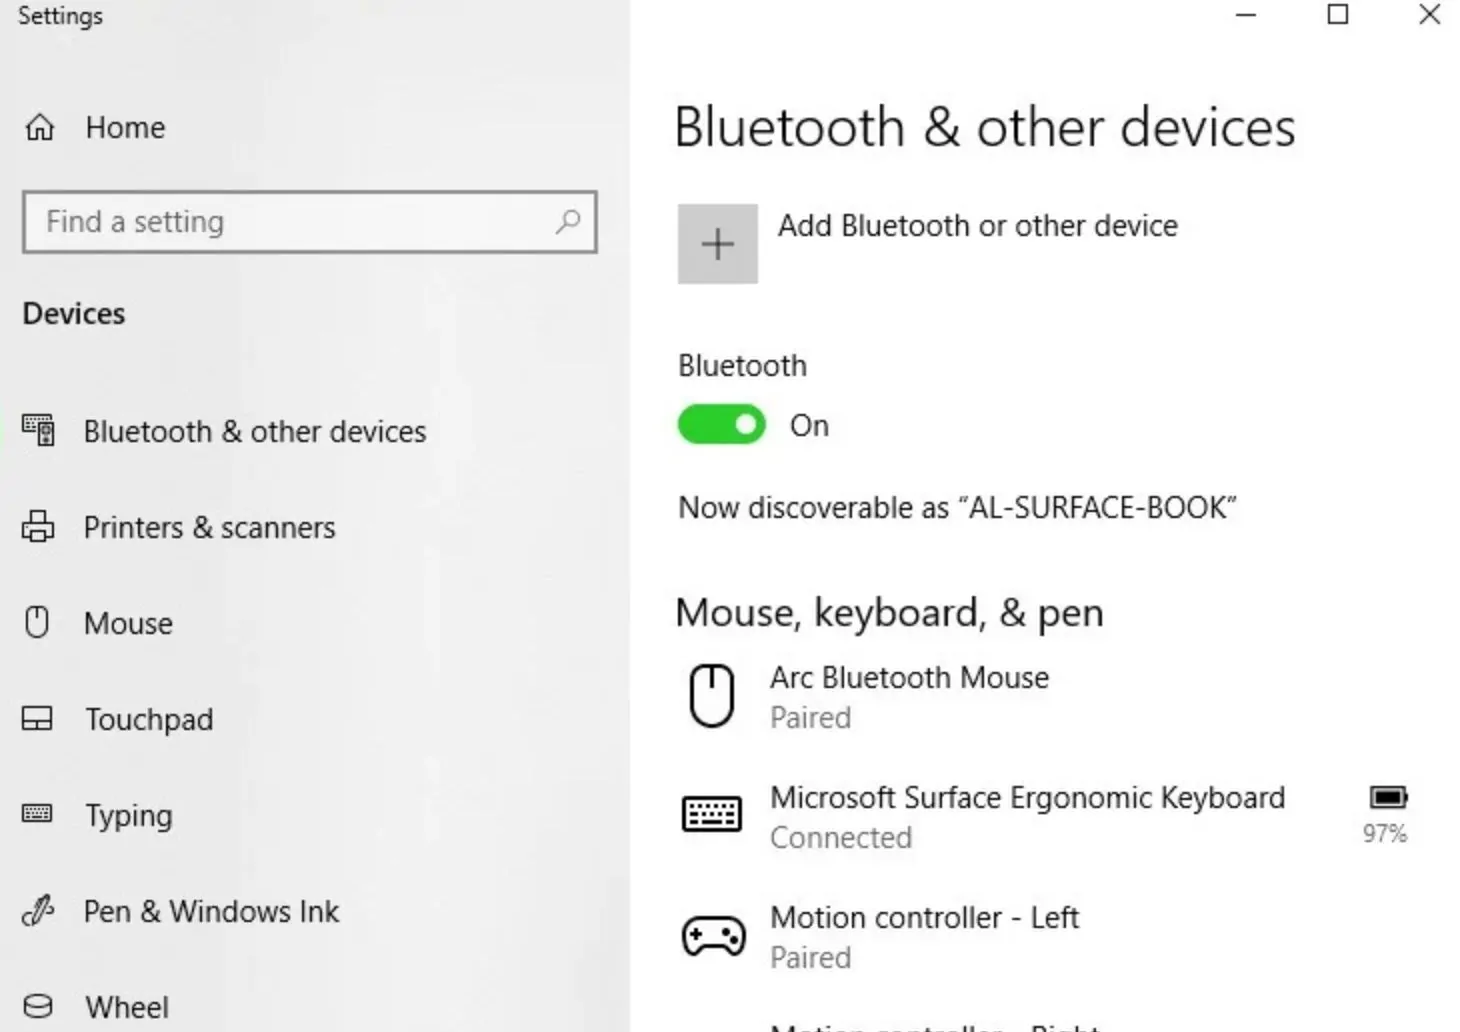
5. Find the Bluetooth and other devices option from the Settings menu. (Note: You can also visit the Bluetooth settings menu from the Bluetooth icon in the System Tray of your Windows PC)
6. Click on the Add Bluetooth or other devices option from the Bluetooth Settings window’s left pane.
7. Select the Bluetooth option from the mini window opened with the title “Add a device.”

8. Choose your AirPods from the available Bluetooth devices in the Add a device window. (Be patient for your AirPods to appear in the list)

9. Once your AirPods and your Windows 10 PC are connected, Windows will display a connection confirmation screen with a message written as “Your device is ready to go!”.

Note: If your AirPods gives some error while connecting to Windows 10, try repeating the above process with a working charging case and proper connectivity.
10. Remove your AirPods from the case and plug them in your ears and enjoy the wireless content.
Make sure to put your AirPods back in the case and close its lid for the safety and performance of your AirPods. As you saw, connecting the AirPods to a Windows 10 PC is the same as connecting any other Bluetooth devices to your Windows 10 system.
Note: For the latest AirPods to work with your Windows 10 system with optimum performance, you may need to update your Bluetooth and audio drivers to the latest versions. Although most modern laptops and desktops come with the latest Bluetooth hardware installed, you can try external Bluetooth hardware devices if your inbuilt Bluetooth device is not working correctly.
Reconnecting the paired Airpods and the Windows 10 PC again
Ideally, your Windows system should detect the previously connected AirPods and connect with them automatically. But sometimes, you need to connect your AirPods manually to your Windows PC because of some detection issues with the Windows System and your device. To reconnect your AirPods with Windows 10 manually, follow on.
1.Open the Settings app of your Windows machine by pressing Windows + I keys simultaneously or from the Start Menu.
2. Find the Bluetooth and other devices option from the Settings menu. (Note: You can also visit the Bluetooth settings menu from the Bluetooth icon in the System Tray of your Windows PC)
3. Under the Bluetooth and other devices section, find the Audio section and select your AirPod’s entry.

4. Click the Connet button to reconnect your Windows 10 Pc and your AirPods.
5. After your AirPods get reconnected to your Windows 10 PC; you can observe a written message “Connected voice, music” under your AirPod’s listing. You may also hear a connection confirmation audio if you are wearing your AirPods.

If your AirPods cannot reconnect with the above method, try putting them back into the case, close the Bluetooth settings window on your PC, and repeat the above process.
If, after applying all the methods to reconnect your AirPods to Windows 10, still, your AirPods won’t connect, try unpairing and pairing them again.
Unpairing AirPods from your Windows 10 PC
Unpairing your AirPods permanently from Windows 10 is almost similar to reconnecting them, but with a minor difference.
1.Open the Settings app of your Windows machine by pressing Windows + I keys simultaneously or from the Start Menu.
2. Find the Bluetooth and other devices option from the Settings menu. (Note: You can also visit the Bluetooth settings menu from the Bluetooth icon in the System Tray of your Windows PC)
3. Under the Bluetooth and other devices section, find the Audio section and select your AirPod’s entry.
4. Click the Remove device button to unpair your AirPods from your Windows 10 PC.
Now you can try connecting your AirPods to your Windows 10 machine again with the same procedure as shown in the first two methods of connecting and reconnecting.
We hope this article about How to connect AirPods to windows 10 has solved all your queries regarding connecting, disconnecting, pairing, unpairing, reconnecting your AirPods with any Windows 10 PC.


